
“Creativity means making a mess… and then cleaning it up.”
I don’t know where or when I first heard those words, but they’ve become a motto of sorts. I say them often, almost every time I begin a new art project.
A lot of people tend to focus on the first part. That’s where the fun is, I think. I can be extremely messy, not merely because it’s part of the creative process, but because I’m clumsy and awkward. It goes back to having been “switched” — a lefty forced to learn and adapt to a right-handed world.
So, I drop things. I get paint on my hands, my clothes, the floor. In today’s project, I doubled down on clumsiness and dropped my phone right on top of the painting I’d just finished.
I spill things, too, and I misplace things, so I’m frantically running around the studio as often as not as my grandfather used to say, “like a chicken with its head cut off.” That, of course, leads to bigger messes.
In most projects, though, it’s really the cleaning up part that produces results. During the mess-making time, we play. We create. We have fun. It’s free, unfettered, and… to be blunt about it, often not practical.
So we have to clean up the mess. We have to take all those different elements we’ve created, put them away in all the right places, we have to wad up and throw out ideas that just don’t work, and we have to start reining it all in, coaxing our creations into usable shapes.
It’s the true union of right-brain/left-brain thinking, and we need both to come up with good results. I’ve always thoughts of it as constructive imagination, or purposeful creativity.
Now, having said all that, I’ll be the first to admit that my project today was heavy on the mess, and I have yet to clean it up. Artistically, I’m not sure what clean-up can happen, and physically… well, once I finish this post, I’ll get around to that.
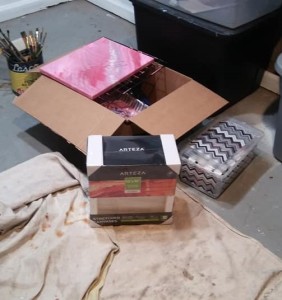
I wanted to document this project step by step instead of simply showing the final result. So, I began by gathering up all my supplies:
 The project is another acrylic pouring. The technique I’m using here is called a Dutch pour.
Most acrylic pouring methods involve the use of a pouring medium — such as Floetrol — and the addition of a silicon oil. A Dutch pour, however, uses neither of these. The paints are mixed only with water to create the right consistency for pouring.
Sounds simple enough, right?
To me, choosing the right colors is one of the most important considerations for acrylic pouring. The color scheme is the area where the artist has the most control over the finished result. For this project, my original color choices were: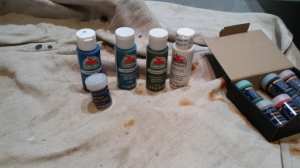
- Too Blue
- Tuscan Teal
- English Ivy Green
- White
- Silver Metallic
In the end, the colors I used were:
- Admiral Blue
- Tuscan Teal
- English Ivy Green
- White
Recently I came across a box of acrylic paints. They’d been missing since our move last spring. I was delighted to find them at last. The “Too Blue” color was from that box. When I opened it and tried to pour a little paint into a cup… nope, not happening. That particular paint was too dried up to use. I think I’ll try adding a bit of water to see if I can bring it back to life.
So, I changed to an “Admiral Blue” I’d bought recently. As for the “Silver Metallic”, oops! I had it sitting out but completely forgot to use it. It’s in a very small bottle, and I overlooked it while mixing and pouring.
The mixing process is where my real mess begins. It involves pouring a small amount of acrylic paint into little cups — one for each color. The paint is then mixed, usually with a pouring medium. With a Dutch pour, only water is used. My problem is in not knowing exactly how much water to use! I’m sure with time and practice I’ll come to a better understanding of paint consistency for pouring. With this project, I think my paints were a bit too thick.
I laid out my 10 x 10 canvas, my rack, my drip pan and drop cloth, and I was ready to pour!

Or so I thought.
I picked up a cup and started to pour and then realized that with a Dutch pour, you start by pouring a solid color — or two — to create a background. Typically this is done with white, although you could use any color to complement your scheme.
I set the paint down, picked up my white acrylic cup and poured it out on the canvas. Yuck. It was a thick glob of paint that wasn’t going anywhere. I grabbed a water bottle and sprayed it a bit. It didn’t help a lot. So, I grabbed the whole bottle of white acrylic paint and started pouring. Yuck, again. More water. What a mess!

Finally with a lot of tilting — and a few more spritzes of water — I had most of my canvas panel covered. I was finally ready to pour.
I started with the English Ivy Green since this would be the darkest hue. The technique involves pouring the paint diagonally across the canvas. Each subsequent color is then poured directly over the previous color.
I poured English Ivy Green, Admiral Blue, Tuscan Teal, and what little White I had left. You’ll see that I didn’t follow the directions completely. I dribbled and dripped little bits of paint here and there. Hey, why not?
The next step in the process involves (a) blow-drying, and (b) leaning down and blowing directly on the paint.
I tried. My paint didn’t want to go anywhere, which is what leads me to believe I didn’t have the right consistency. But, I persevered. I kept at it, getting paint all over my blow dryer (which will now be a permanent part of my art studio supplies), and all over me, as well. But, gradually I began to see possibilities. Of course, I used a few spritzes and sprays of water, too, to convince my stubborn acrylics to move. Acrylics and I just don’t get along, remember. How many times have you heard me say that before!
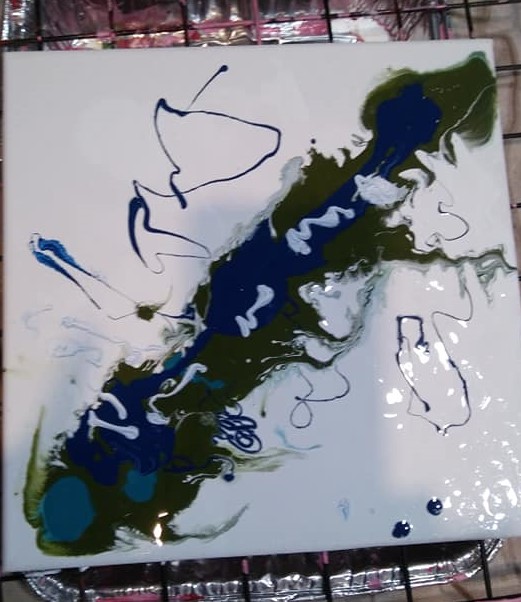
Here are a few photos:


While I was happy with parts of the painting, there were other parts I didn’t like. I squirted and spritzed a bit, felt that I was losing what I liked, and finally said “Fine, it’s done.”
It was somewhere while taking the photographs above that my phone slipped from my grasp and fell onto the painting. It took a picture as it landed, I think.
Now that it’s all over, I think I do like this Dutch pour method, and I do want to try it again. Another technique often used with this method is “torching”. Yep, you heard that right. Using a small butane torch — like one might use for creme brulee — you heat the paint on the canvas.
Yes, I have a torch. Yes, I have butane. Yes, I’m going to try it — next time. For now, I’ll get busy cleaning up the mess in my studio.

Good to see you letting rip with the paints:). Have a lovely weekend. Janet
LikeLike
My studio is a wreck! LOL…about time to clean it up. 🙂
LikeLiked by 1 person
That’s always a good sign that lot of work is going on:)
LikeLiked by 1 person
Definitely. My husband is going to be working down here a bit, plus he’ll be using my clean-up area for himself. I don’t need him tripping and falling!
LikeLiked by 1 person
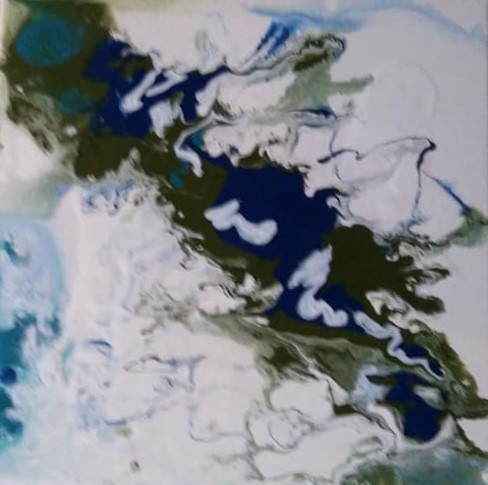
🙂 THis one3 looks like what one might see in a plane flying over the Arctic looking down at at an Indigo Black clean sea inlet with snow and ice all around. Very aerial photograph in feel. I LOVE this one. It has that quality of wonderful ambiguity so it takes me on a strobes journey, like a mind film, as I morph through scales and different things feel to be there.
Excellent piece, Judith!
LikeLiked by 1 person
This has been my best acrylic pour yet. It’s funny really. Pouring seems so simple, and yet there’s a lot to be learned. I’ve spent a good part of my morning watching videos about paint densities and viscosity. I’ve never really thought of acrylic pouring as “art”, but there really is more “art” to it than I realized at first. Now that I have a nice set-up in my studio, I’m definitely going to play around with more pouring techniques.
LikeLiked by 1 person
🙂 And may I suggest that it will also deal with the viscosity of the flow of YOUR pour, the flow of you being fluid and simply hand-dancing pouring out the acrylic? As a thought.
LikeLiked by 1 person
I’m sure that’s true!
LikeLiked by 1 person
🙂 I love your stick-to-it-ive-ness and finding your flow. This feels like decades from that class that you expressed that was so indelibly… there. It’s really fun to watch your process and you doing it YOUR way.
LikeLike
I am planning on doing a Dutch Pour this afternoon. I am actually trying it on a wood background this time using some old discarded venetian blinds I found.
LikeLiked by 1 person
Let me know how it turns out!
LikeLiked by 1 person
I will!
LikeLiked by 1 person
You sound so much like me, I love the messy part of painting, not so much the cleaning part! I do like your pour, the colors are lovely!
LikeLiked by 1 person
Thanks. So far, it’s the only pour I’ve done that I actually like. 🙂
LikeLike
I think the creativ process are about being playful, not allowing yourself to judge the ideas. At first you may be a “little stiff” restraining yourself unconsciously, but when you stop thinking the ideas comes by themself like a stream of water. I`m messy too spreading pencils, drawings, papers and other tools around the room.
LikeLiked by 2 people
Making a mess is always fun. I love throwing ideas here and there, scattering bits of pieces of things around. For me, it’s fun, too, to “clean it up” in the sense of finding ways to use those ideas, figuring out where to “put” a character in a story, for instance, or where to “put” elements in a drawing. I’m fortunate to have an endless supply of ideas — they’re everywhere — so learning to use them constructively has been important for me throughout my life. The physical part of cleaning up… LOL. My studio is such a mess. I think I will be doing a bit of cleaning and re-organizing later today.
LikeLiked by 1 person